Guide
A support for the creation of your digital art collection
1. How to activate a SpeakART account
To have your account: Write an email to info@www.speakart.it and we will be happy to create an account tailored for you. Once SpeakART staff creates your profile, you will receive an email with a link that will allow you to change the password on first access. From that moment, you will be able to sign in autonomously thanks to username and password. Make sure that your computer is always connected to the internet. Indeed SpeakART is a cloud software. (FAQ) To log in, go to the home page www.speakart.it and click on MY ACCOUNT.
There will be a screen where you can enter the username or the email address and the password to access the system. Welcome! Since now your collection will be manageable, updated, reliable and safe!
2. Control panel
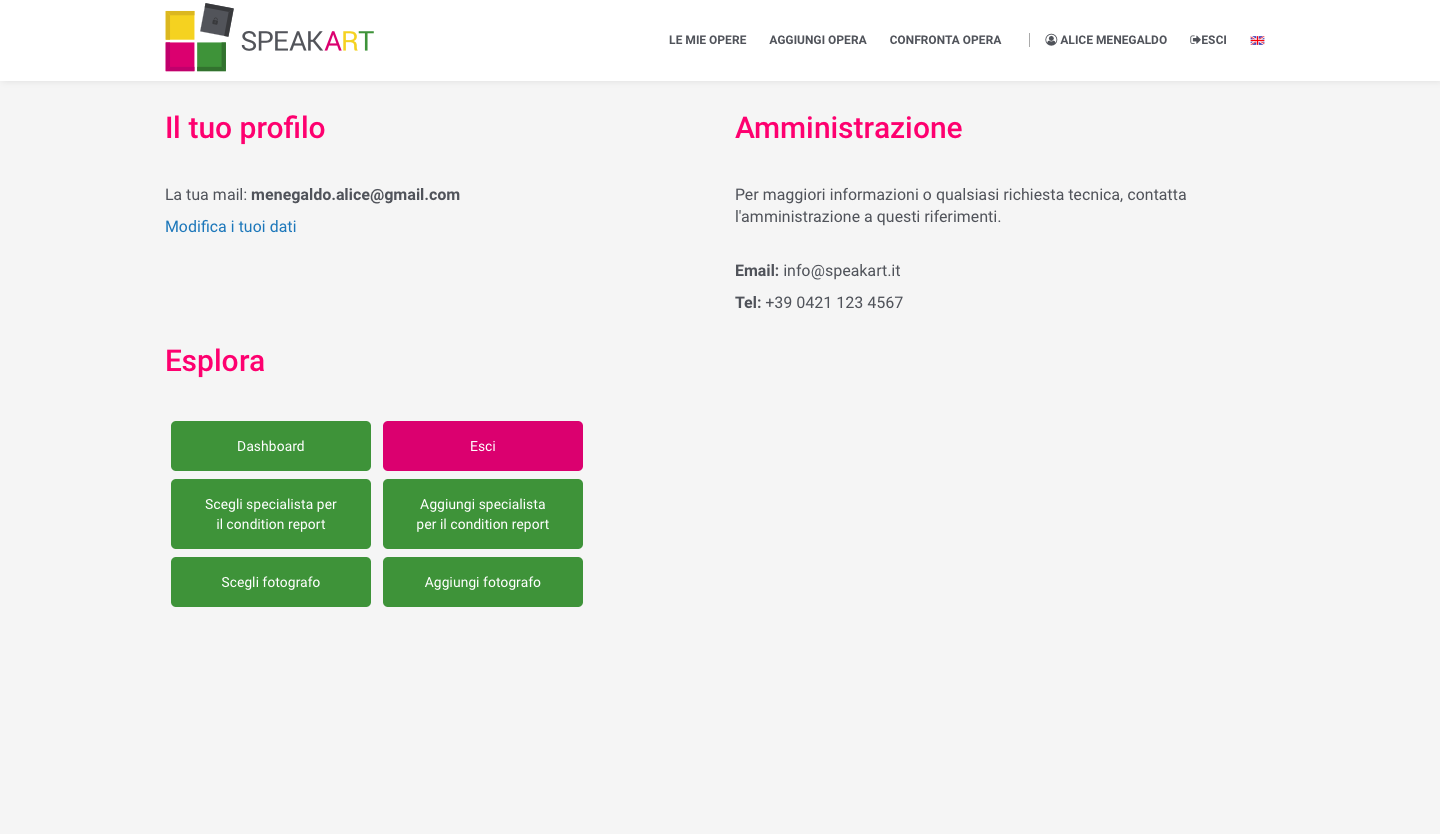
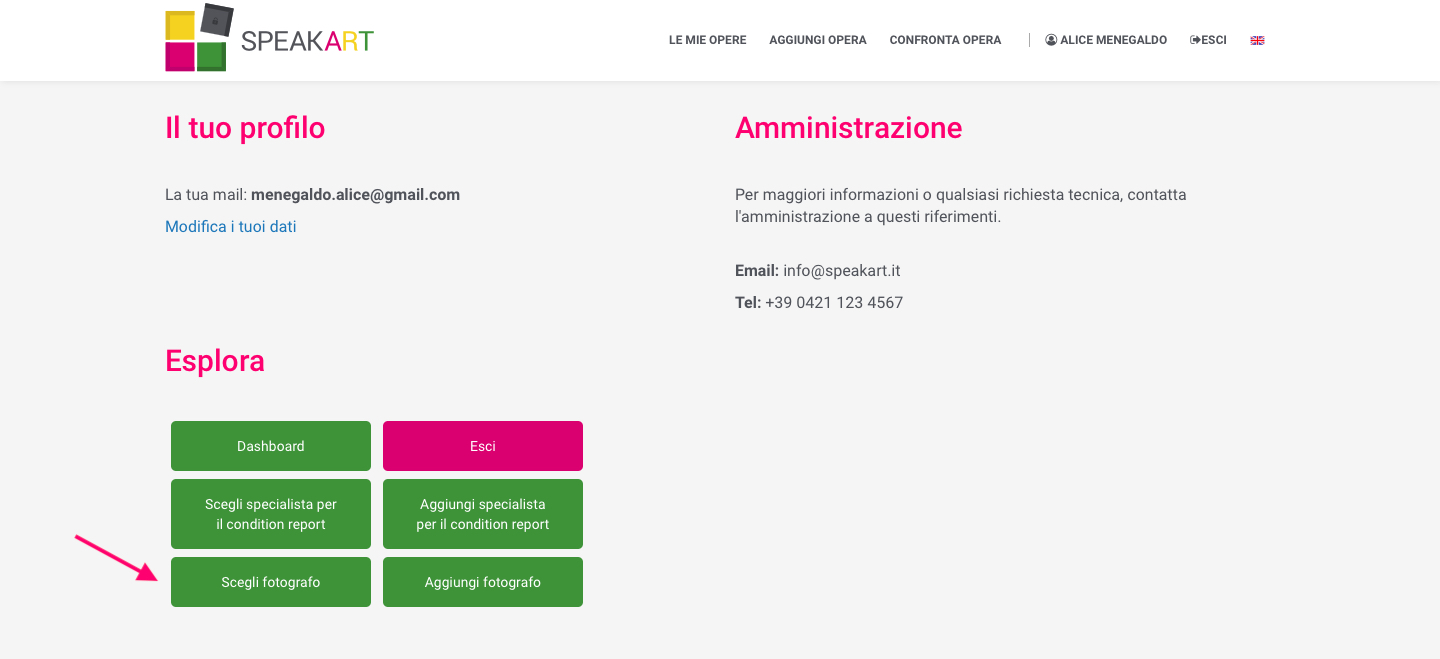
Once logged in with the username/email address associated with the profile and the password, you will be in the admin panel of your profile.
Here you can:
- Access to the software, clicking on Dashboard
- Log off, clicking on Logout
- Use the invitation system for third party professionals to allow them to interact with your artworks for their parts of competence: compilation of condition reports and matrix snapshots.
3. Cataloging
3.1. View an artwork
You can search an artwork already in the database from your account, by the smart search that SpeakART offers.
You can search the work using these parameters:
- title,
- author,
- date
- identification number that you will assign during the saving.
It will not be necessary to complete the field, the search will be responsive from the first typed character making your entire database available by skimming all the possible options with the characters you gradually typed.
To view an artwork from your artworks list, simply click on the corresponding bar or on the “i” symbol.
The artwork report you completed and some commands next to the title of the artwork will appear.
- The “trash can” symbol is the command that allows you to delete an artwork.
- The “pencil on the sheet” symbol is the command that allows you to modify or update the artwork report.
- The “Download pdf” label allows you to download the artwork report with the images (but without the documentary part) of the object in question. You have the possibility of sharing it, file it or print it easily and tidily.
- The“Condition report” label allows you to produce a condition report, to duplicate the closed ones, to modify a draft or to print a pdf. This topic is explained in detail in chapter 4 of the guide.
3.2. Add an artwork
To add an artwork, click on the top right menu “Add an artwork”.
A new tab with blank fields will open.
Remember that you can save an artwork simply entering the first four parameters of the Artwork general information section:
- Type of artwork
- Title
- Author
- Year
SpeakART offers a wide choice of information to enter in order to catalogue the pieces in an exhaustive and complete way.
In the Artwork general information section, it is possible to identify the object with its basic information.
Neatly proceeding between the consecutive sections “Size” and “Records”, it will only be necessary to keep the information updated.
It will be possible to hide from, or in any print of the PDF reports, the owner’s name by selecting the “hide owner’s name” checkbox.
Museums and exhibitions
In the “Museums and exhibitions” section, you can keep all the past and present exhibitions of the catalogued work updated.
Each of them can be individually eliminated if necessary, by clicking on “Delete exhibition or museum”.
Restorationsi
In this section, you can keep the track of all the restorations carried out on the artwork: you can note the duration, a brief description and upload the related documents, photos and information detailing the event.
What happens after saving an artwork
On the first save, which physically creates the space for your artwork in the database, four labels will be displayed at the top next to Edit Work.
3.2.1. Documents panel
In the documents panel it will be possible to add all the useful documents and to create a real identity card for the artwork. Thanks to the recognition DIMA (matrix), it will have an indissoluble bound with the artwork.
All the uploaded documents will be available to be shared, printed or downloaded.
Certificate of Authenticity (COA) or similar
The first and essential document that SpeakART allows to insert is the COA (certificate of authenticity) or an equivalent document.
Selecting through the drop-down menu the type of certificate and uploading the file with the right format, we are literally putting the certification of the artwork in a virtual strongbox.
Free movement certificate
Another important document is the free movement certificate, which actually is a real passport thanks to which some types of artworks have the green light to travel outside the European Union and outside Italy. Its deadline is reported in an appropriate space and five months before that date an expiration notice email will be sent to the owner of the property, in order to remind you to renew the certificate if there is an interest.
Signature
In many respects, the photographed or digitized signature of the author is an interesting element to preserve or to exhibit.
Additional documents
In this section it will be possible to upload any type of additional document to those mentioned above such as publications, certifications, declarations, words of the artist about the work, memories of particular events in the life of the object.
Here too, the type of the uploaded document will be described, the file will be uploaded and a brief description will be given for completeness.
There is no limit to the amount of uploaded documents, simply clicking on Add document more space will be created to upload an additional document.
All the additional documents will always be at your disposal and it will be possible to remove them at will.
3.2.2. Matrix Panel
The matrix panel will be the place where SpeakART’s proprietary algorithm will do the magic, where the digital fingerprint which links the information, the identity and the state of the artwork to the artwork itself will be created.
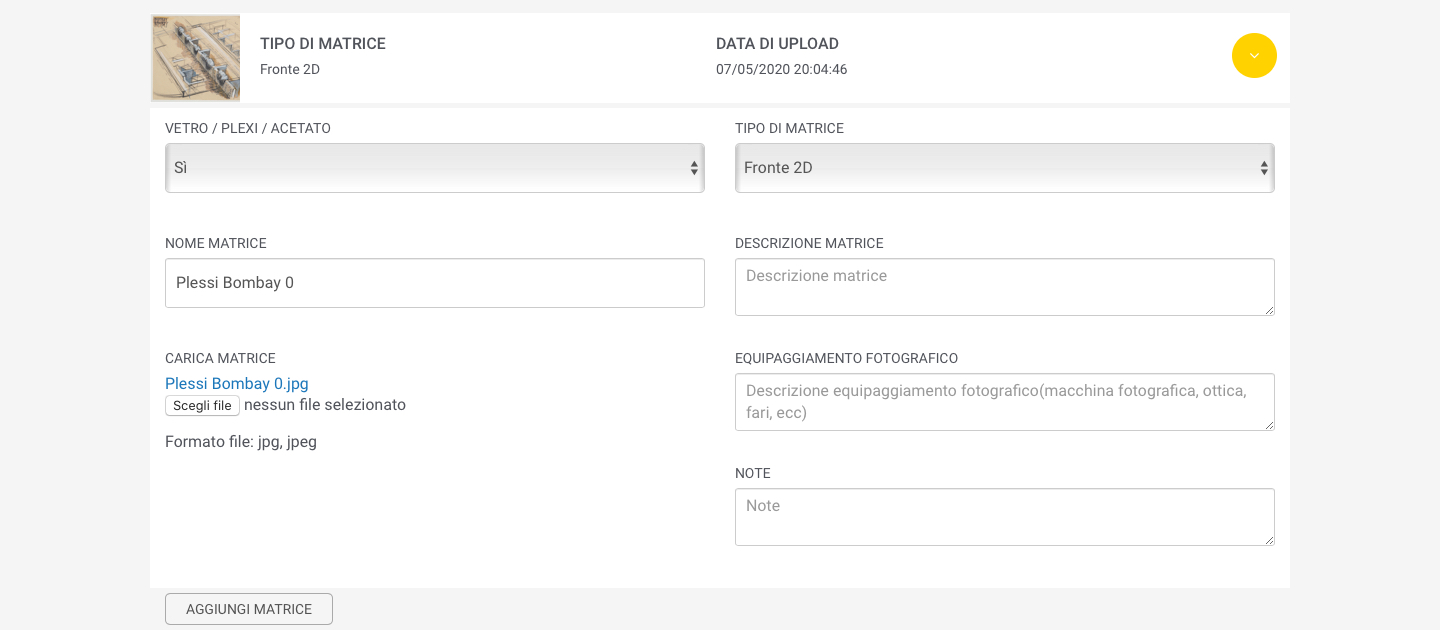
The mandatory fields to fill in are the first two:
- “GLASS / PLEXI / ACETATE” through the drop-down menu that indicates if a medium is interposed between the snapshot and the work.
- “TYPE OF MATRICE” specifying through the drop-down menu which matrix it is
The other optional fields will be “NAME” and “DESCRIPTION” of the matrix.
Through the “UPLOAD MATRIX” field you will have the possibility to choose the file which will be saved to produce the digital fingerprint of the artwork.
At last, there will be space to potentially insert the photographic equipment used and the notes to the snapshot.
In the top right menu, you will find a green label with the words “photographic protocol”. Before taking the high resolution image, it will be very important to read and follow the simple instructions indicated both for smartphones and cameras.
3.2.3. Images Panel
In the images panel it will be possible to upload all the photos related to the artwork, but also to events and exhibitions, to particular situations or happenings.
It will be simply necessary to upload the image, to name it (you should have a standardized method to name the images of a collection) and possibly to add a description of it.
3.3. Edit an artwork
To edit an already saved artwork from “MY WORKS” panel, it is necessary to click on the edit symbol.
The same applies if you open the artwork report by finding the same symbol on the top next to the title.
At this point the artwork report will be open and all the necessary changes will be made.
See chapter “What happens after saving an artwork”.
4. Comparison
This is the most innovative and important part that SpeakART offers to keep your works safe.
Thanks to this function, you can compare a matrix saved in the database with a posthumous matrix to find the differences noticed on the artwork in the lapse of time.
All the reported differences will be an excellent indicator, a safe and objective method to allow you to detect the state of the artwork you are photographing. In case your artwork is replaced with a fake, you will have the possibility to detect differences; in case there is an accidental damage or natural decay, it will be easy to identify its size and position..
Obviously, thanks to the comparison, you can really be sure that the analyzed artwork is the one you entered and that the stored information is inextricably linked to it.
The creation process of the digital fingerprint of your artwork will begin when the matrix is entered in the database.
4.1 Compare a matrix
To compare a matrix it will be necessary to have previously entered a primary matrix (called primary) in the system. See chapter 3.2.2
If this step has already been executed at any time, a second matrix can be taken and compared with the previously stored one, or it can be saved for a further comparison.
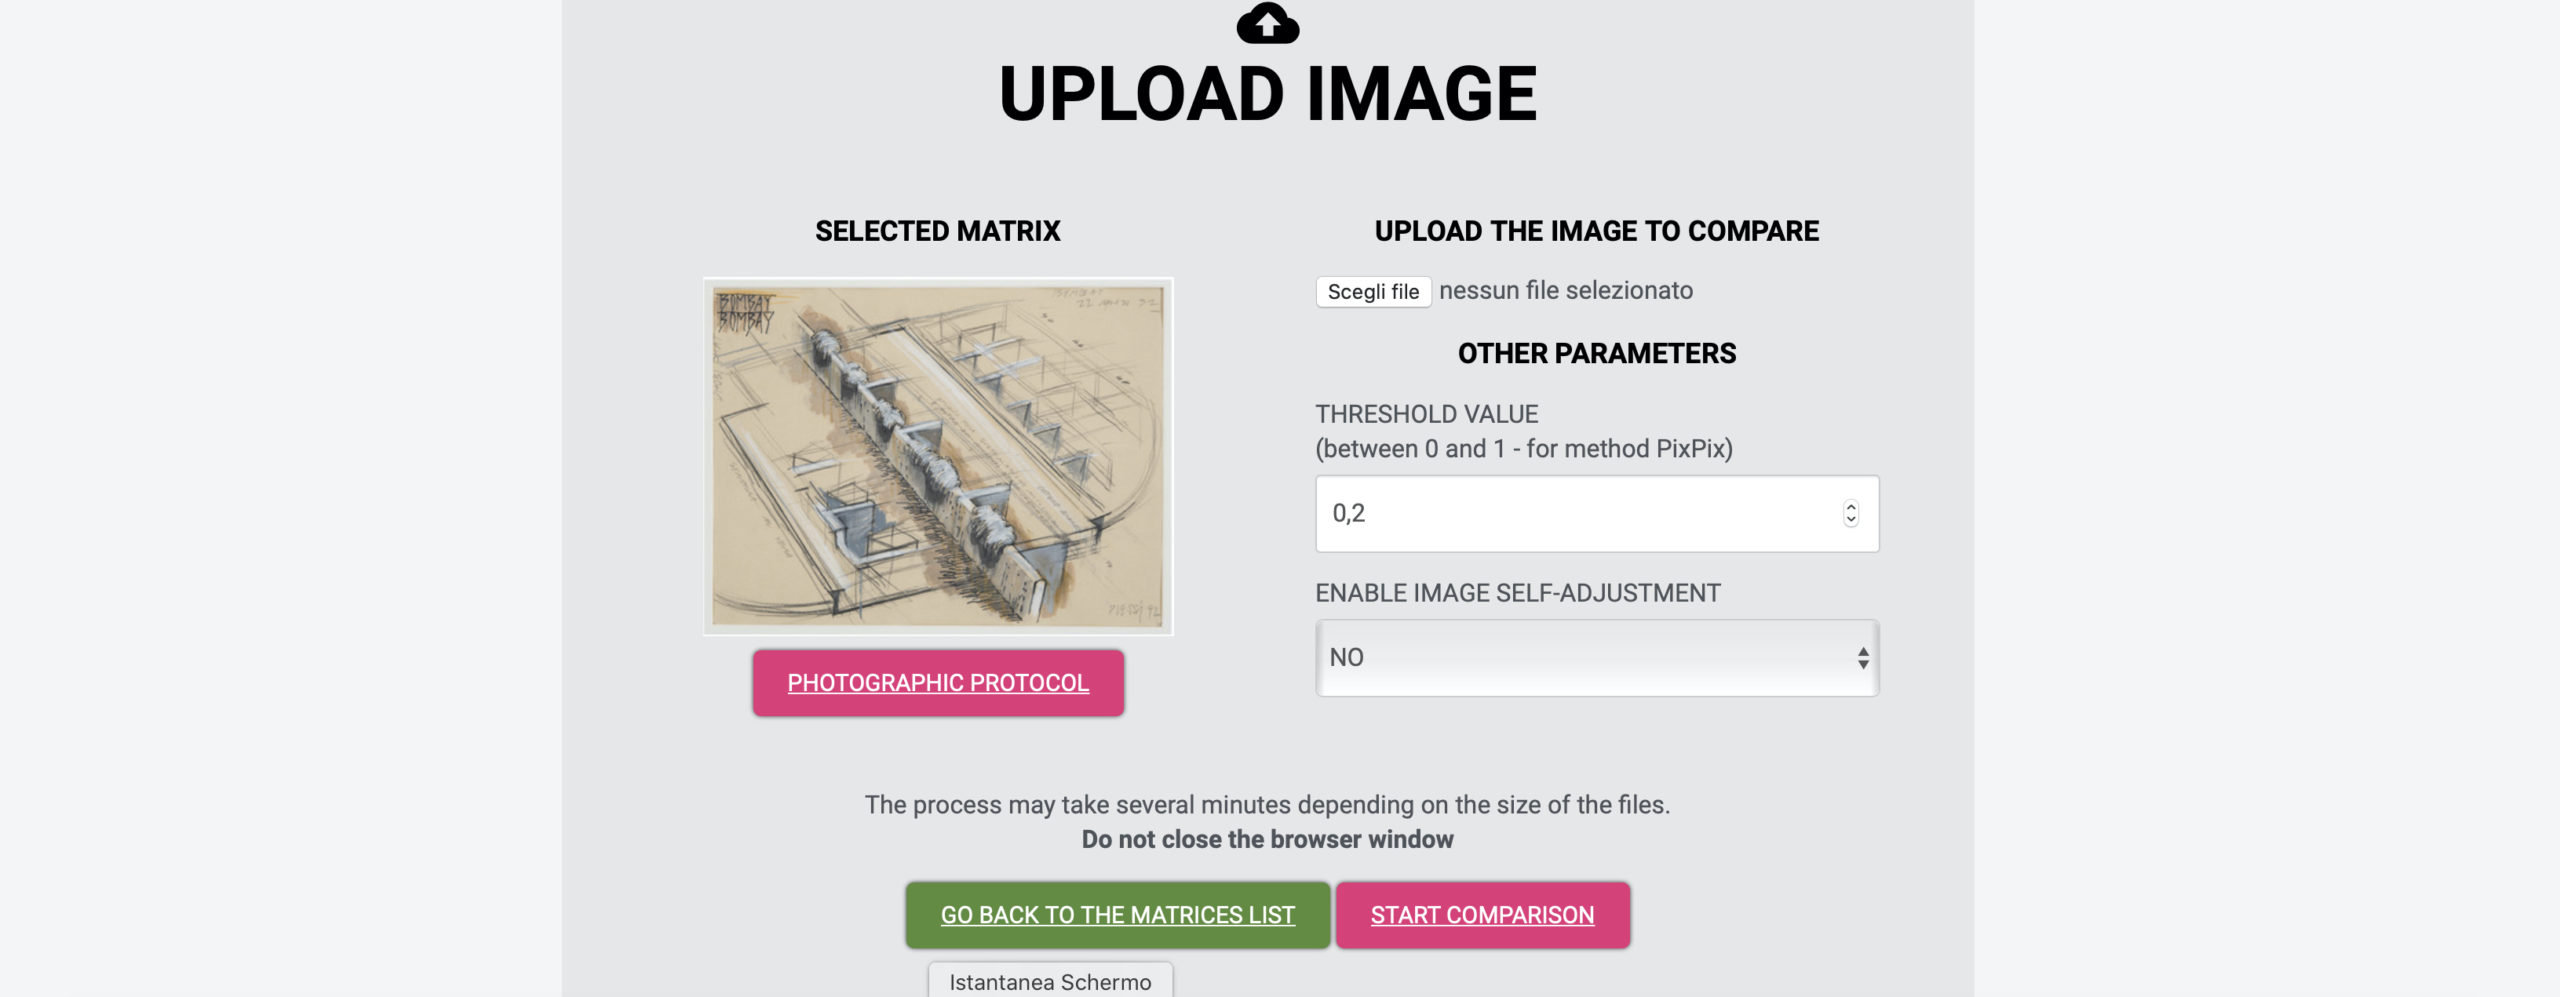
To compare a matrix click on “Compare artwork” and then on “Start”. At this point, the software will make available all the matrices that you have previously stored and a search to select the matrix to be compared.
Remember: only the last stored matrix will be automatically selected.
Select the matrix by clicking on the chosen image, at this point the comparison panel will open.
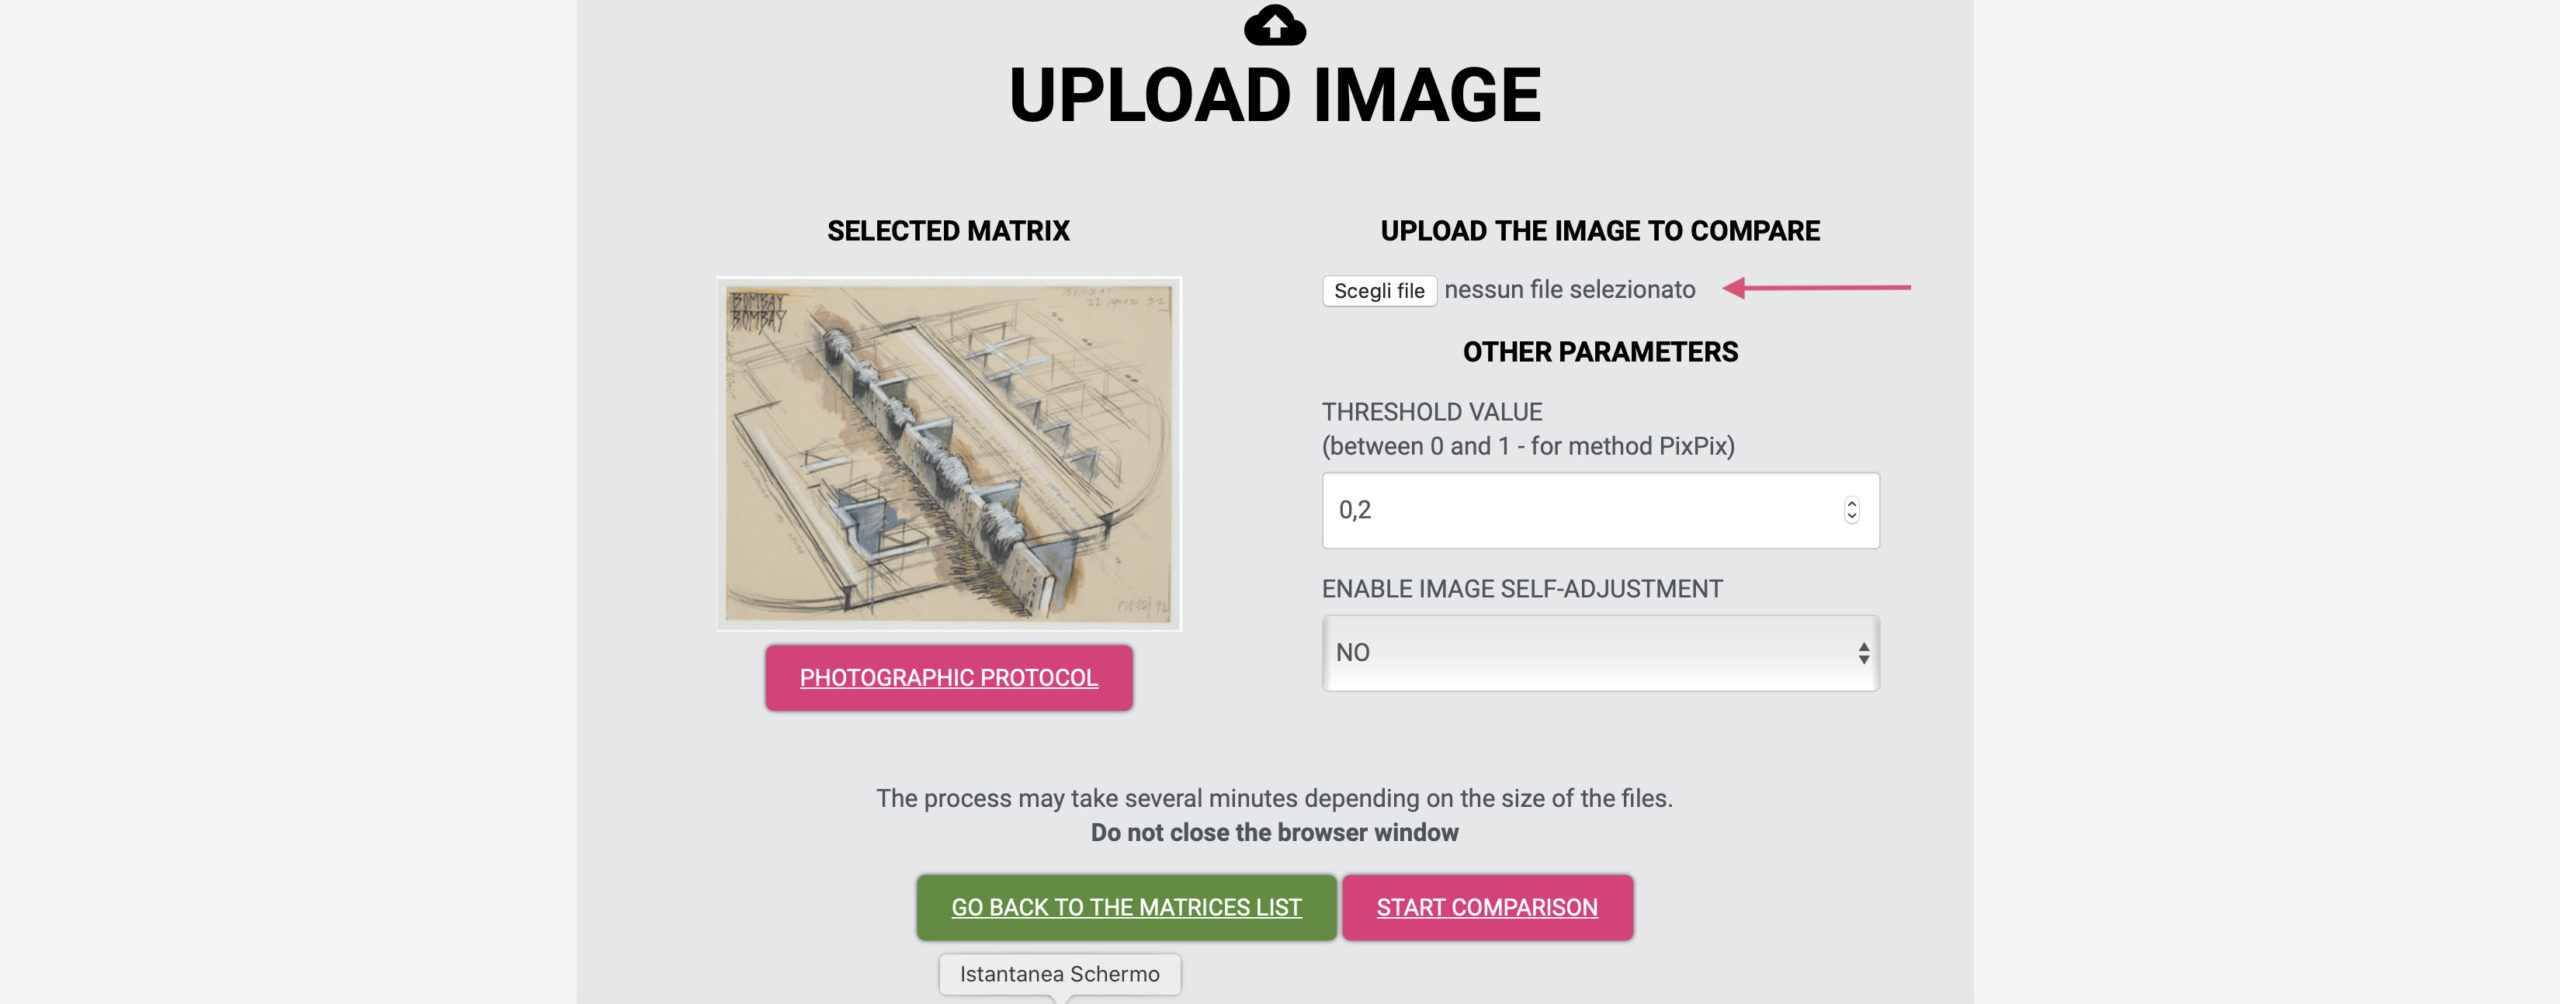
Choose the file to compare and upload it using the specific box.
Start the comparison with “Start Comparison”.
The software will do all the work by itself: it will crop, rotate, adjust the loaded image, balance the color and superimpose it perfectly on the previously saved matrix image.
After a few seconds the software will give you a precise and varied output. Four different images will be shown with an overlap percentage.
4.2. The results of the comparison
- PixPix Method: observes the differences between the two snapshots in terms of correspondence of each pixel thanks to the comparison based on the optical flow of the two images.
- DiCSi Method: observes the differences between the two snapshots according to a structural similarity index that predicts perceived chromatic quality between the two digital structures.
- OPRA Method: observes the differences between the two snapshots through a series of comparison arithmetical operations, called channel operations.
- DIVA Method: observes the differences between the two snapshots through the arithmetic comparison on the pixels, with the difference between absolute values.
5. Condition Report
It is the section of SpeakART that allows anyone to draw up a document certifying the state of the artwork, even the owner who analyzes his artwork carefully. QIf this document is drawn up by a professional, it will have a different value and it will be a real official document and may be called condition report.
5.1. Add a condition report
- to have saved an artwork (see chapter 3.2 “add an artwork”)
- to click on the top left box “Condition Report”
At this point a panel will open and thanks to it you can view all the saved condition reports, add others or duplicate the already existing ones. To add a condition report, you must simply click on “Add a condition report”.
5.1.1. Step 1/4 General information
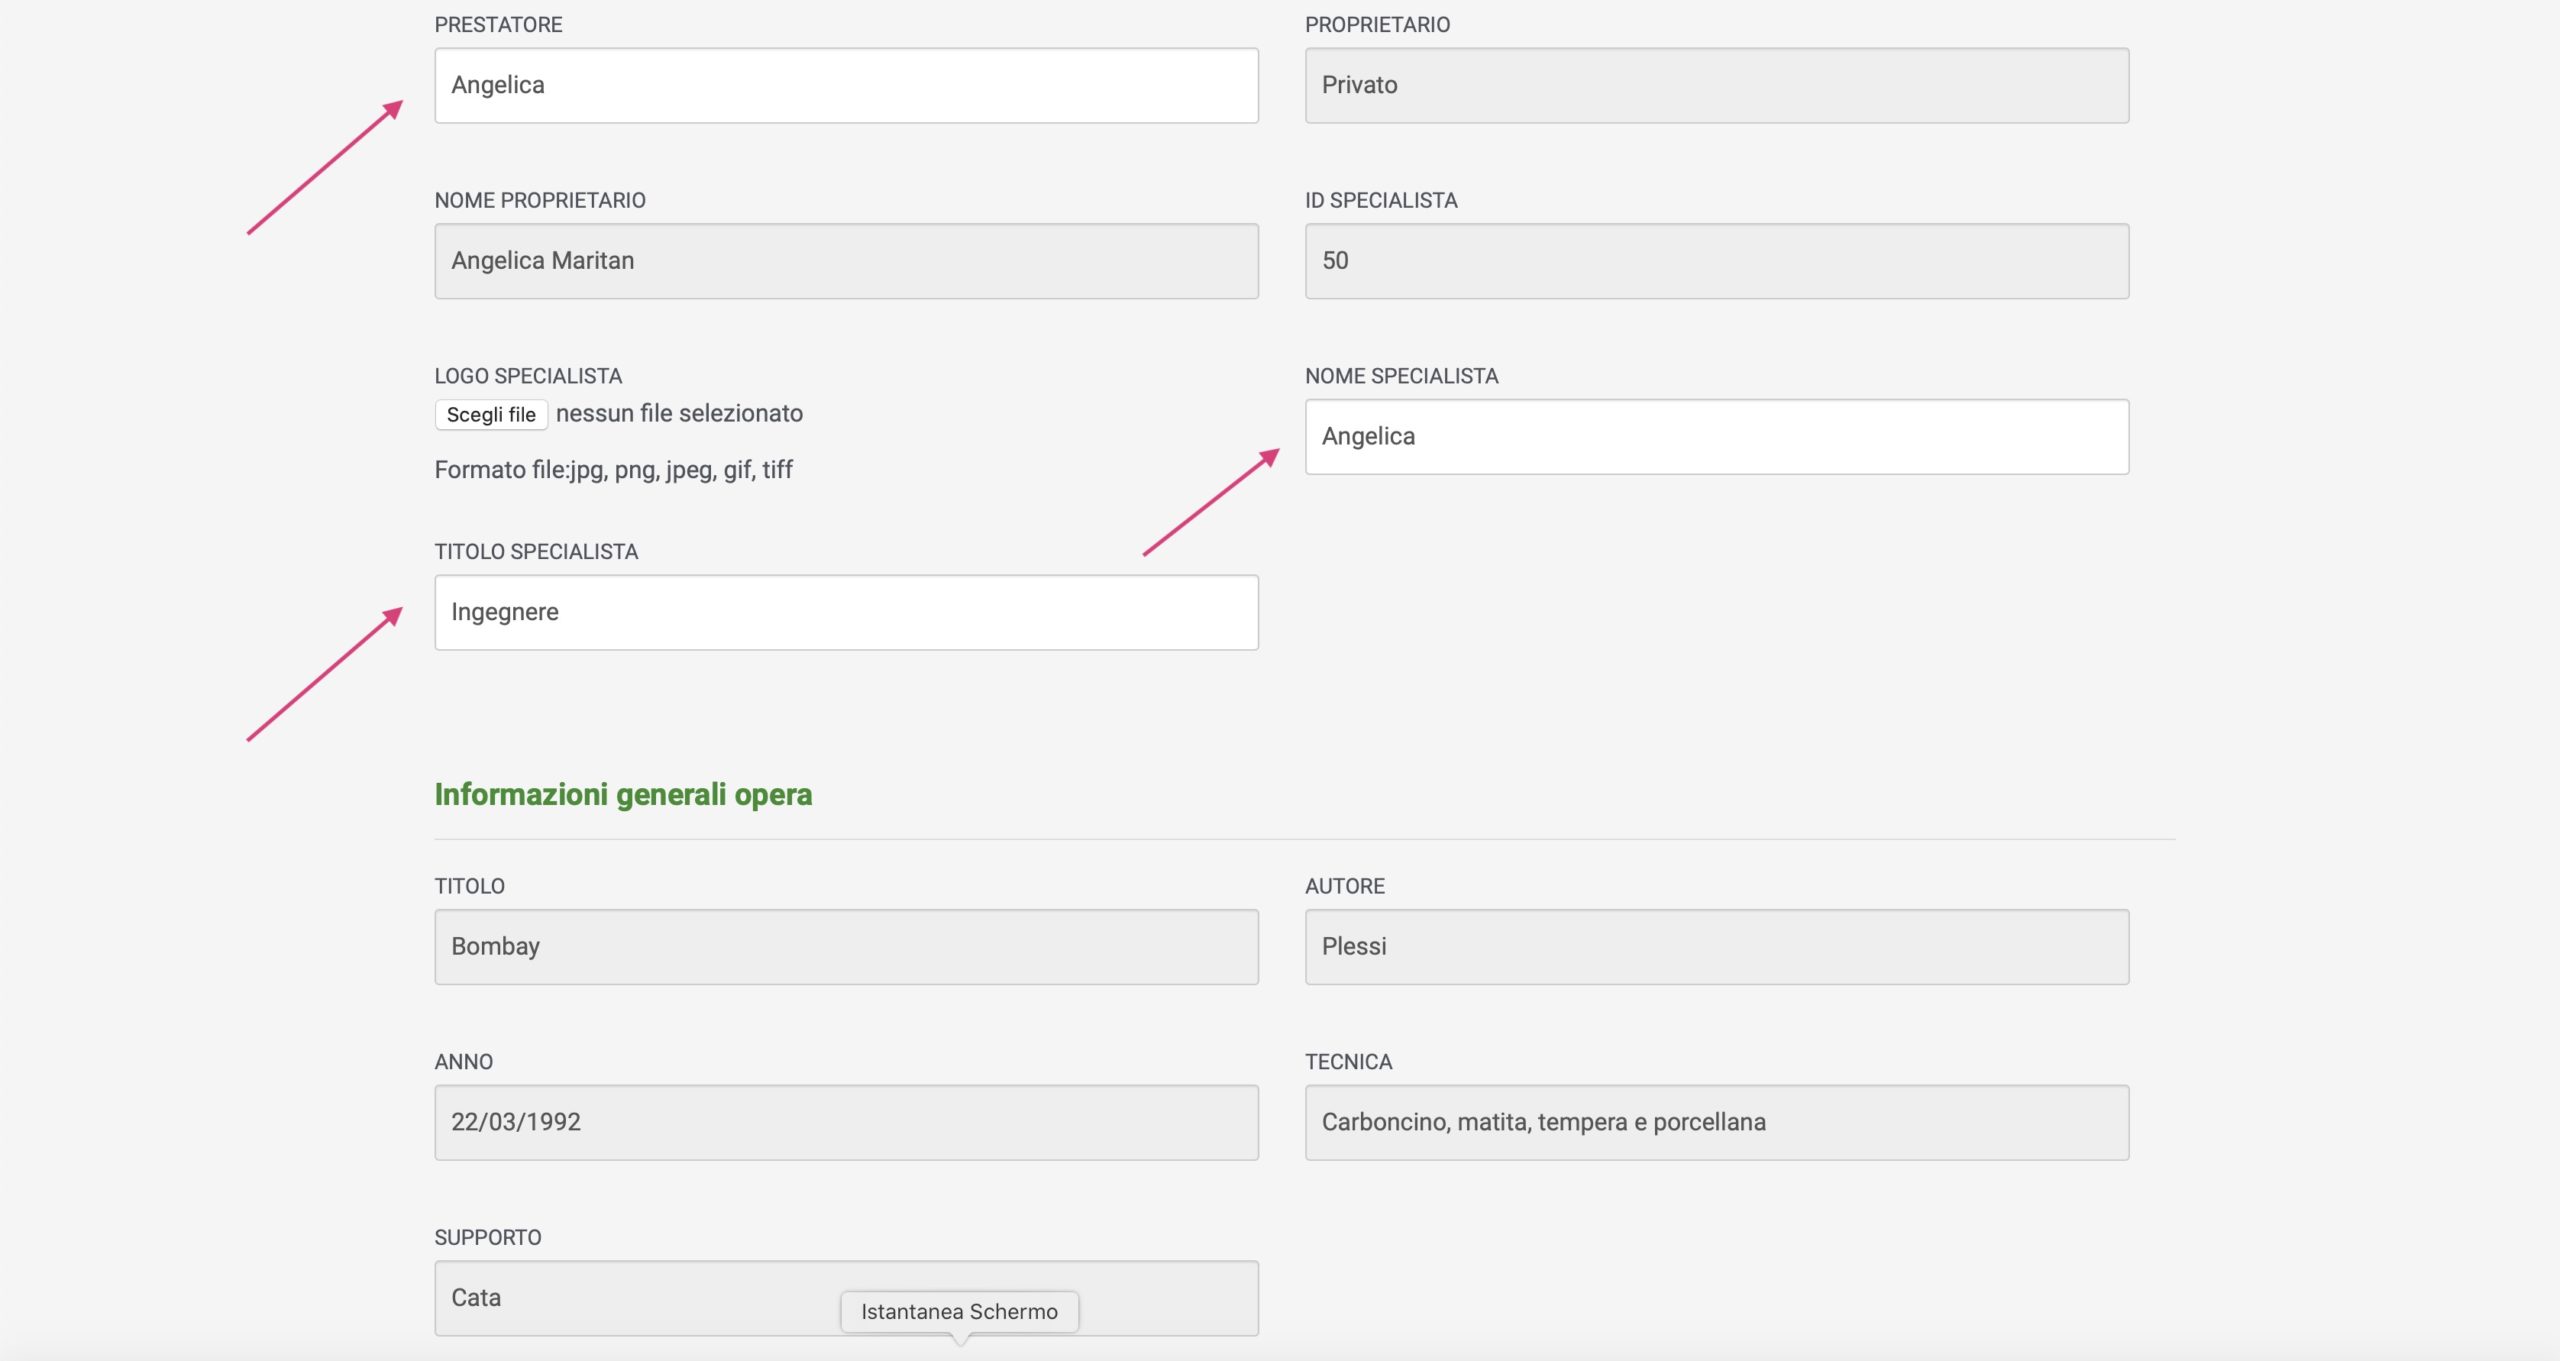
In this section all the data (in grey) are automatically filled in by the software which draws from what was previously saved for the customer profile and from the artwork record. The only fields to fill in this section are:
- Lender
- Name and Title of the Specialist
- Logo of the specialist who creates the report
At this point you move on to the next section by clicking on “Save”.
5.1.2. Step 2/4 Details of the artwork
Here too the fields to be filled in will be limited, and in particular they will concern any exhibitions for which the document to be filled is requested. In particular the non-prefilled fields will be:
- Details of the exhibition
- Exposure period
- Loan period
- Description of the damages to the frame
- General conditions of the frame
5.1.3. Step 3/4 Logistic, installations and environmental conditions
If the information were available, all these fields would help anyone interacting with the work in caso of handling and display. A condition report should be drafted every time the work is moved. The environmental conditions are open fields so they can be described as recommended conditions or as punctual events to report.
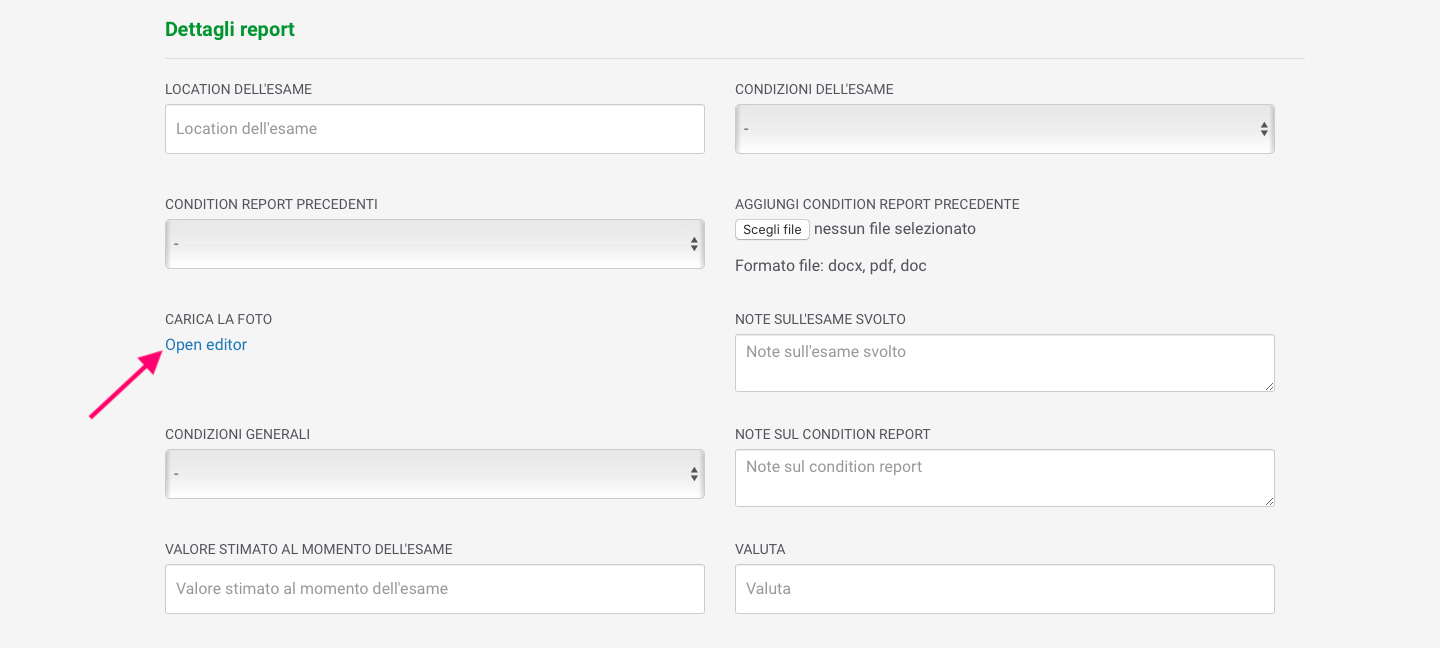
5.1.4. Step 4/4 Details of the condition report
This is the last part of the condition report before the saving and here is the most interesting and dense part of the exam. In particular, space will be given to:
- describe where the exam is carried out
- save previous condition reports
- indicate on an image of the artwork the particulars to report giving punctual description through the editor
- describe and comment on the actual condition of the work
- give an evaluation
5.1.4.1. Use the editor and the notes
Clicking on “Open Editor”, another page of the browser will open where you can use this extraordinary and very useful tool.
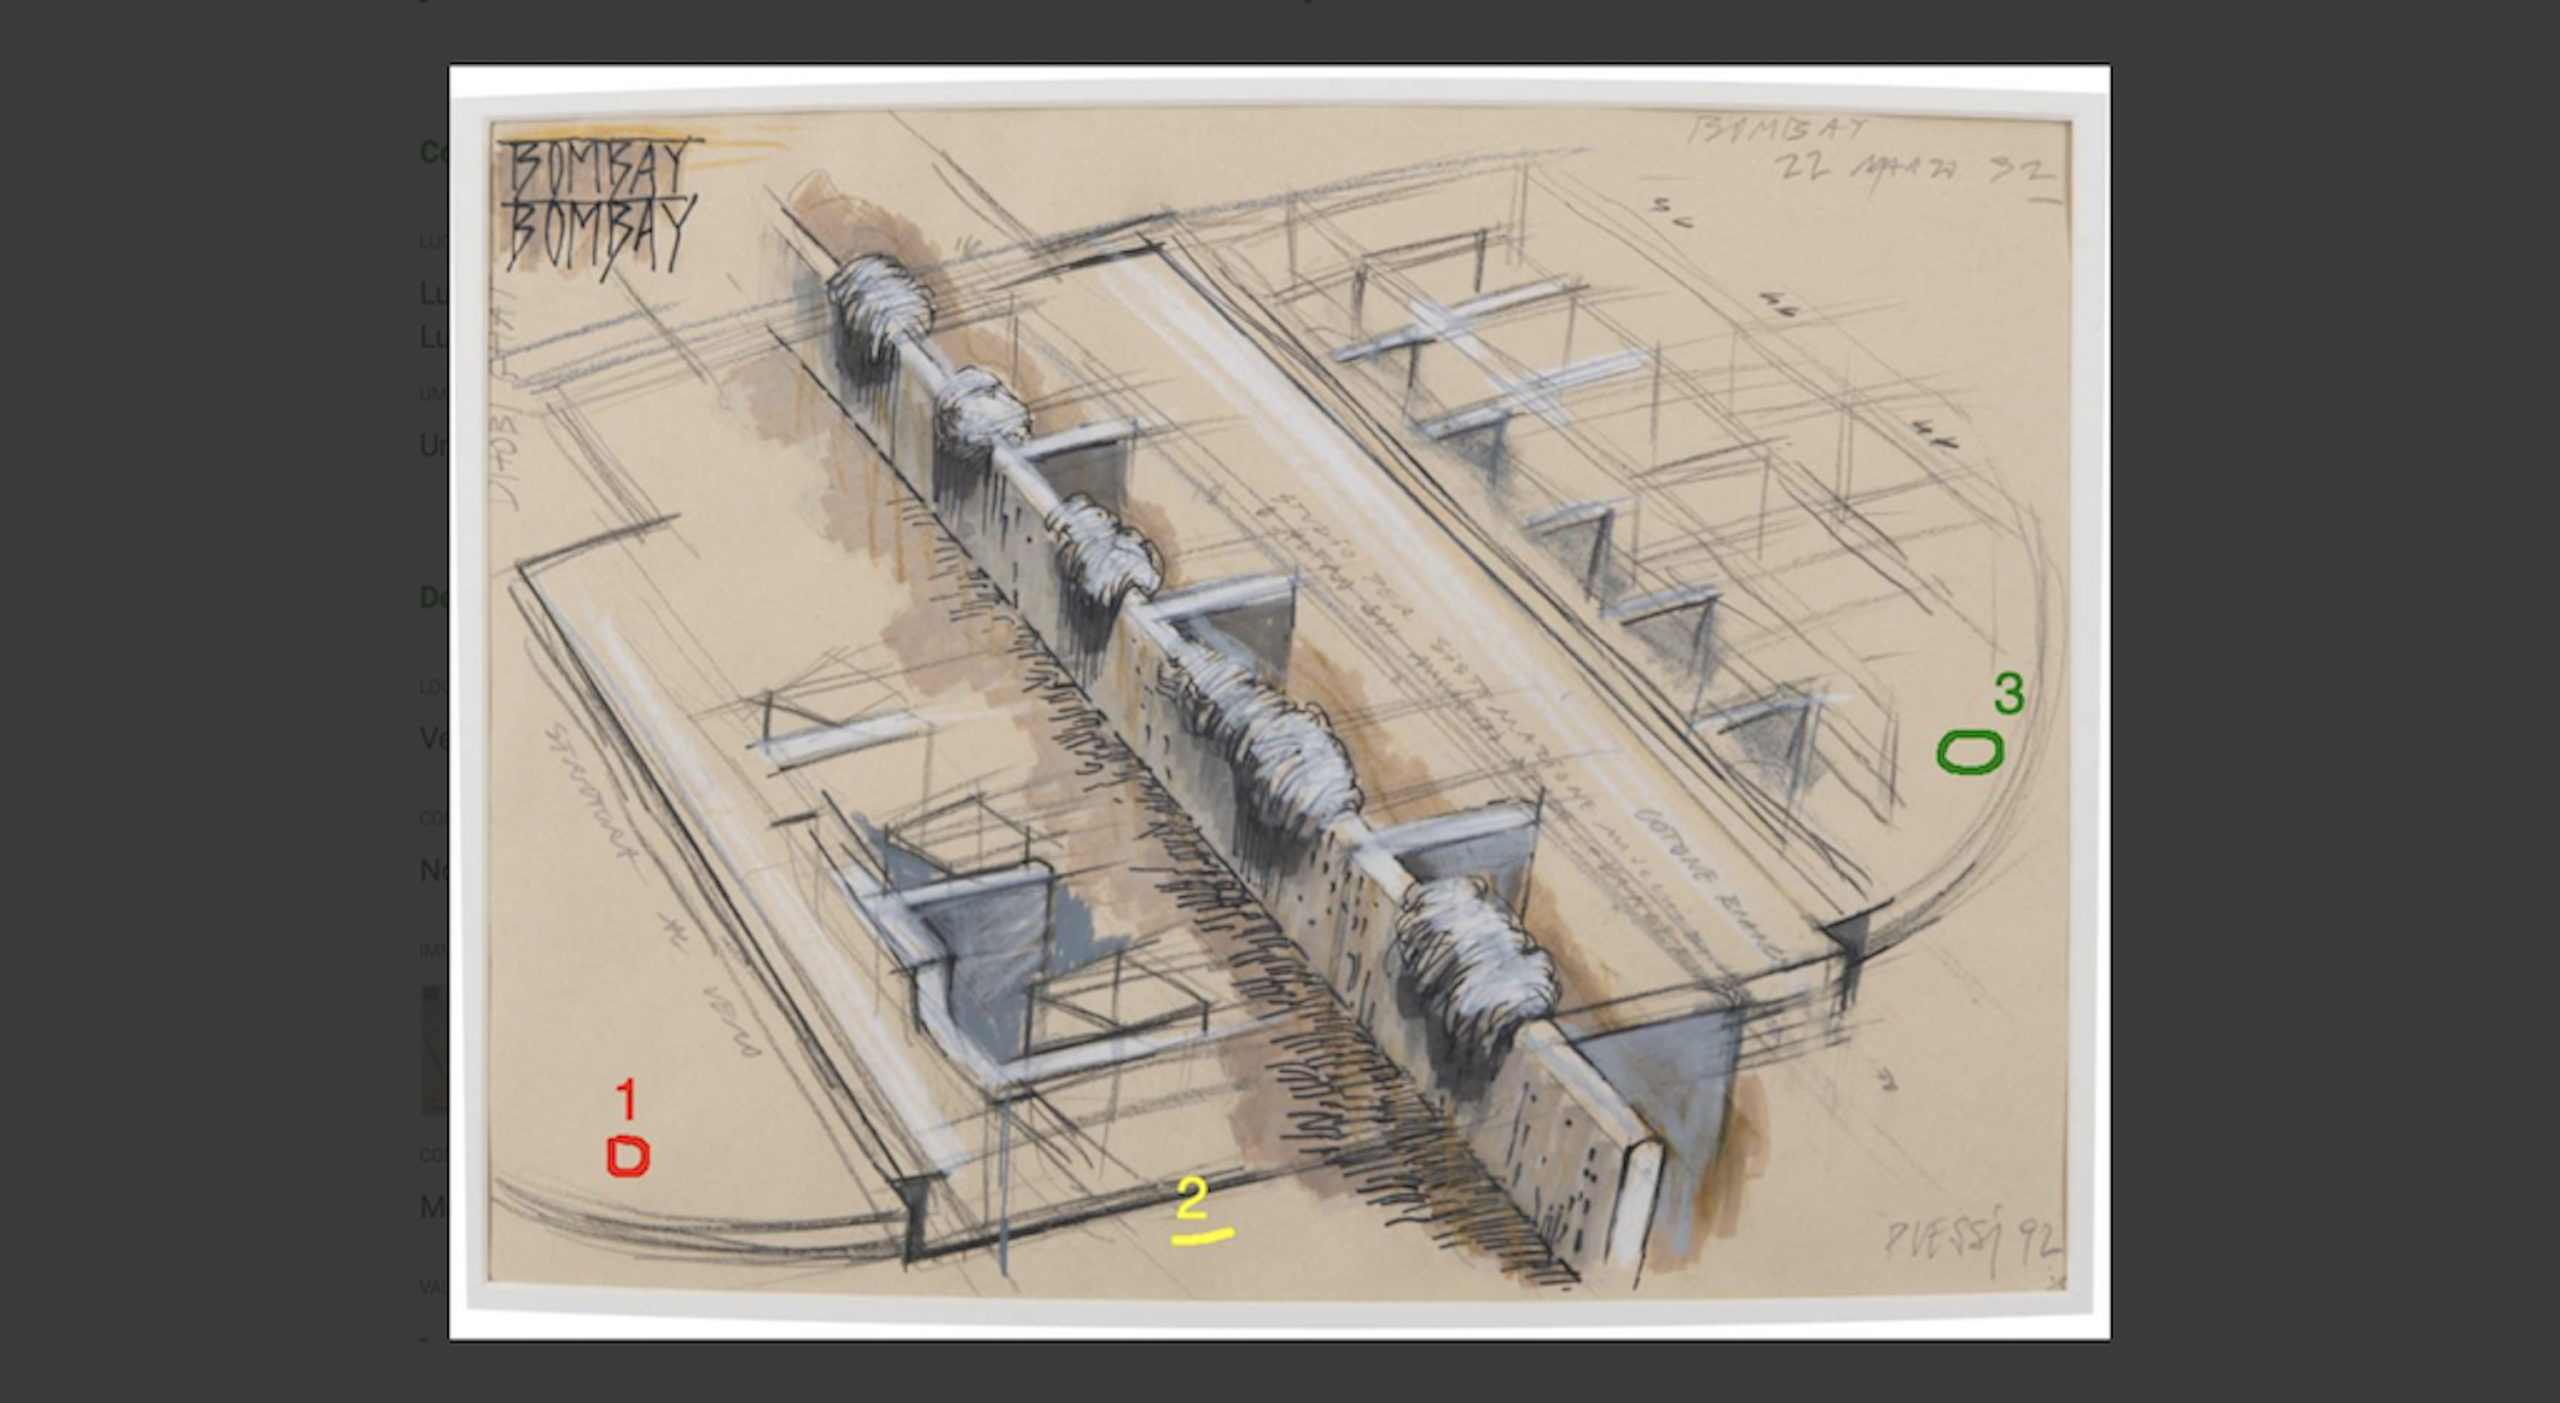
Clicking now on “Upload Image” you will be able to upload an image of the artwork where you can graphically report the damages or the information to highlight.
Thanks to the very simple system of the digital pen with the traffic light colors (plus white) that is at the bottom left of the uploaded photo, you will be able to draw on the photo what you consider more appropriate to indicate what is necessary. Every report will be linked to a number, and to each number you will be able to leave a particular comment about the found damage/anomaly.
Once saved the screen with “Save” or “Save and Close”, these comments will be reported together with the image in the final condition report. You can exit the editor simply clicking on “Save and Close” or “Save” and closing the browser window.
5.2. Save a condition report
To save a condition report, you have two possibilities.
Once the fourth section of the document has been completed by clicking on “Save”, a screen will open that will make you a choice:
Right in green: save condition report as a draft.
Left in pink: save condition report (permanently).
In the first case, this document will appear in the list: open for other changes, not duplicable, not printable.
In the second case, this document will appear in the list: permanently closed with date and time of saving, duplicable and printable.
5.3. Clone a condition report
Usually when there are multiple condition reports created in a relatively short time frame, there are few elements of difference between one and the other and the specialists remain the same. If these conditions are met, the professional will be able to clone one of his previous condition reports and create a new one modifying only the elements of difference between the two exams. This will reduce the processing times and allow you to carry out very precise and accurate exams by keeping track of them automatically and effortlessly.
6. Invitation system
Thanks to this system, you will be able to invite photographers or condition report editors to interact with your collection/group of artworks.
It is a system that is activated with an invitation, a link, which will be sent via email to the professional of your choice.
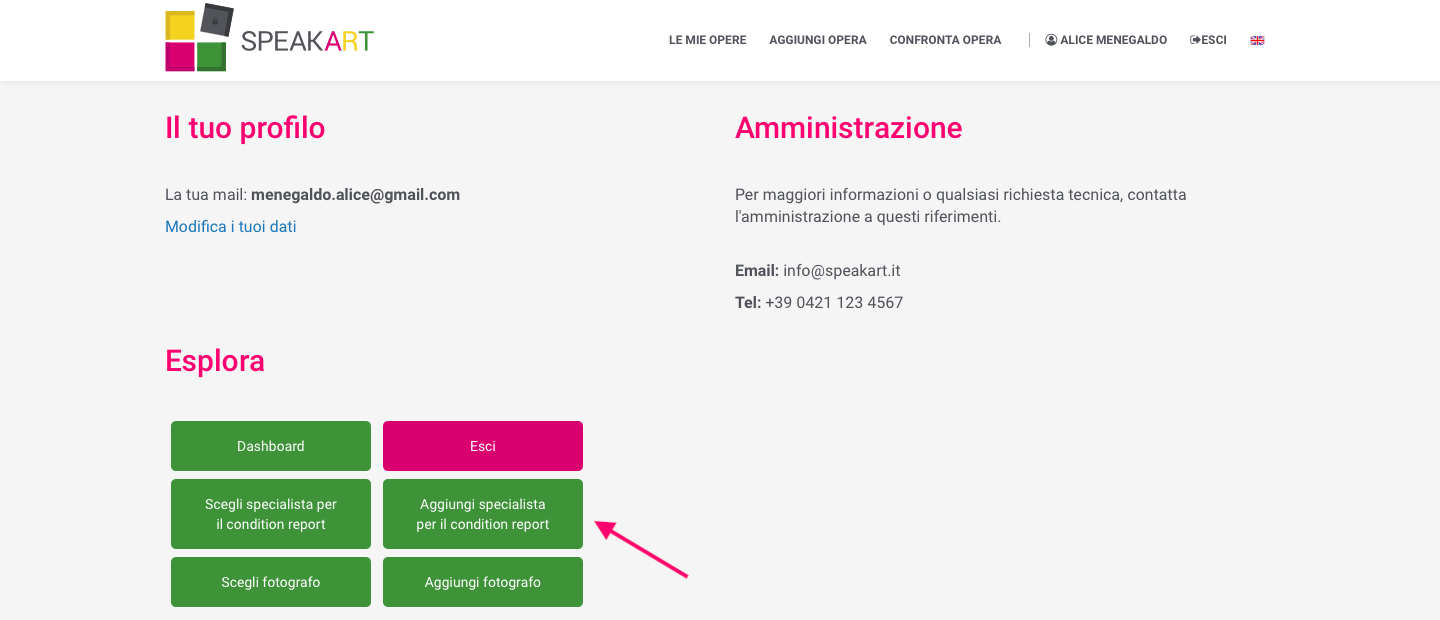
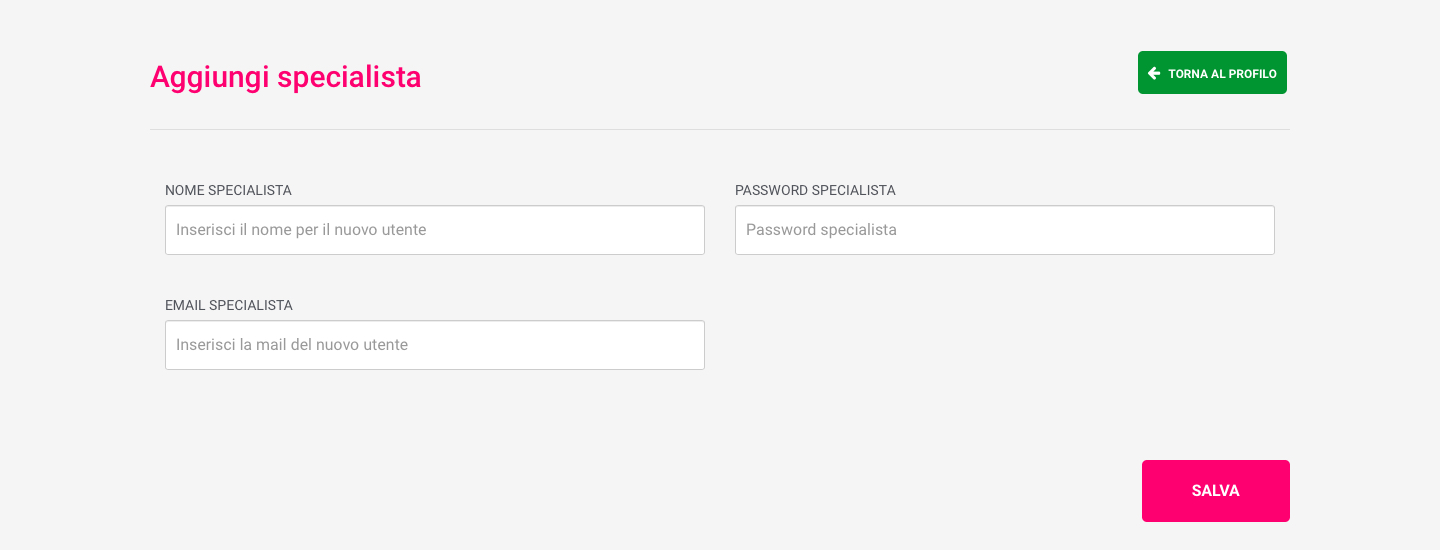
6.1. Add a specialist to compile a condition report
If the professional is new to those you contacted or if your list has not been filled yet, click on “Add a specialist for the condition report”. Enter the required data and click on “save”.
At this point, the professional will receive an email with the invitation to change his access password.
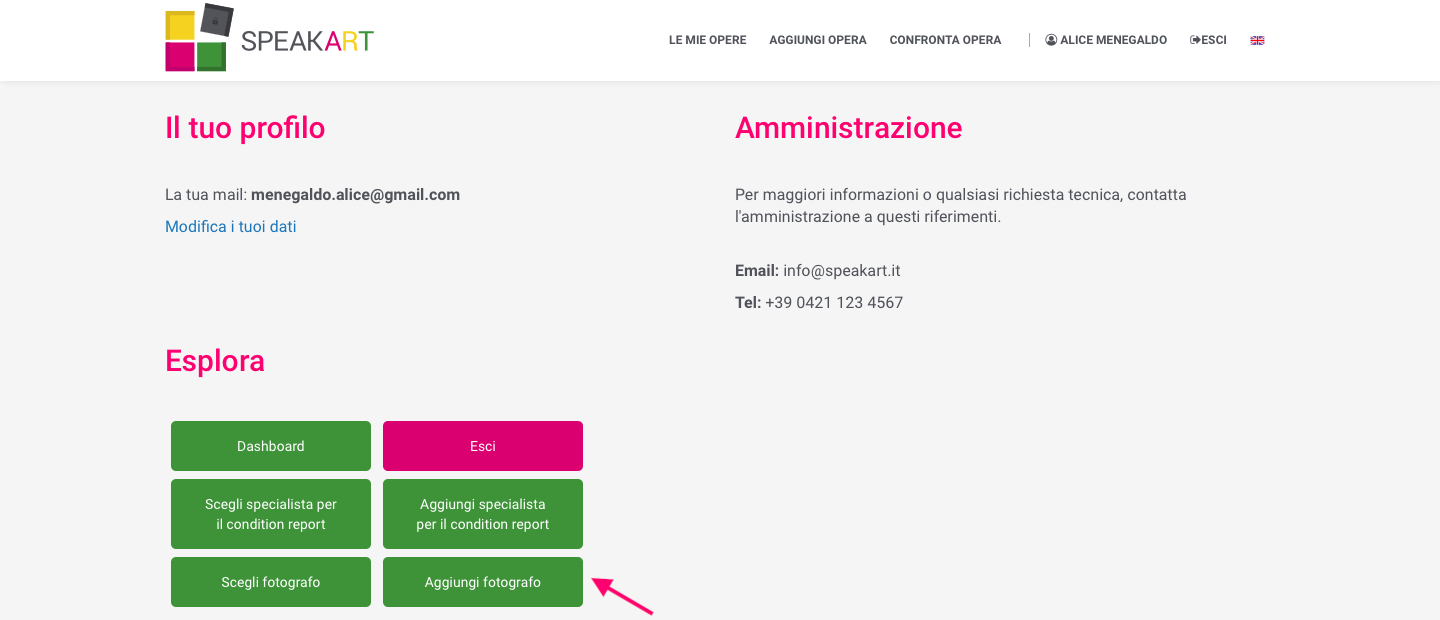
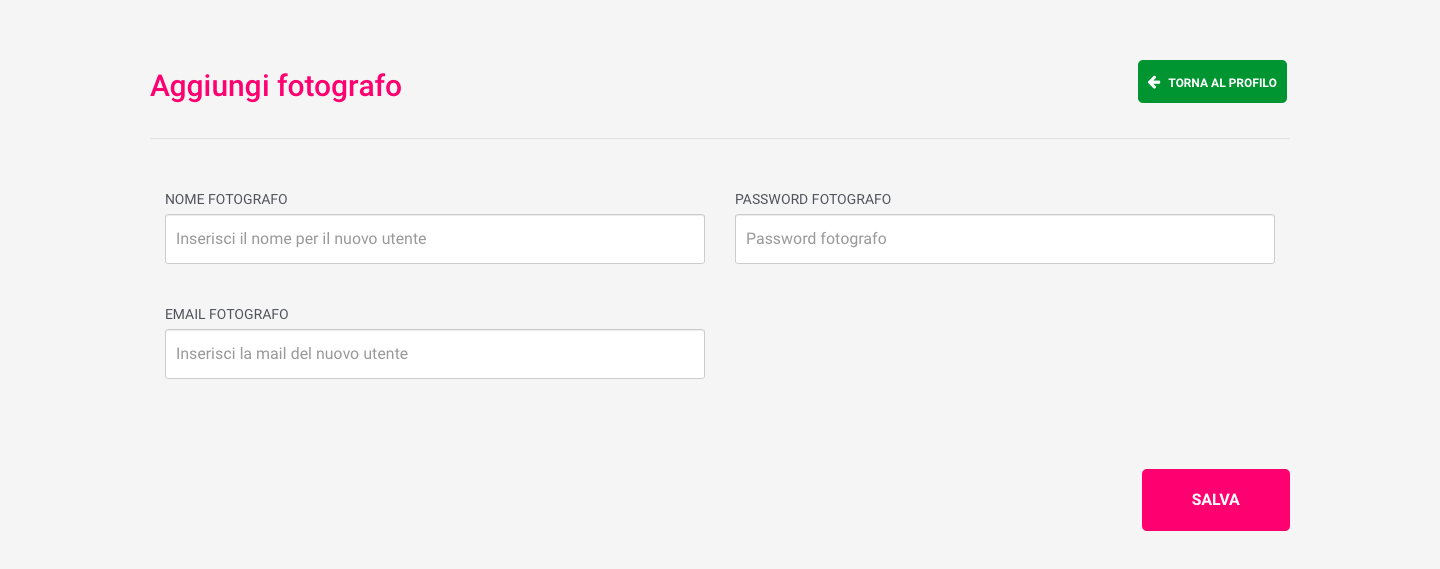
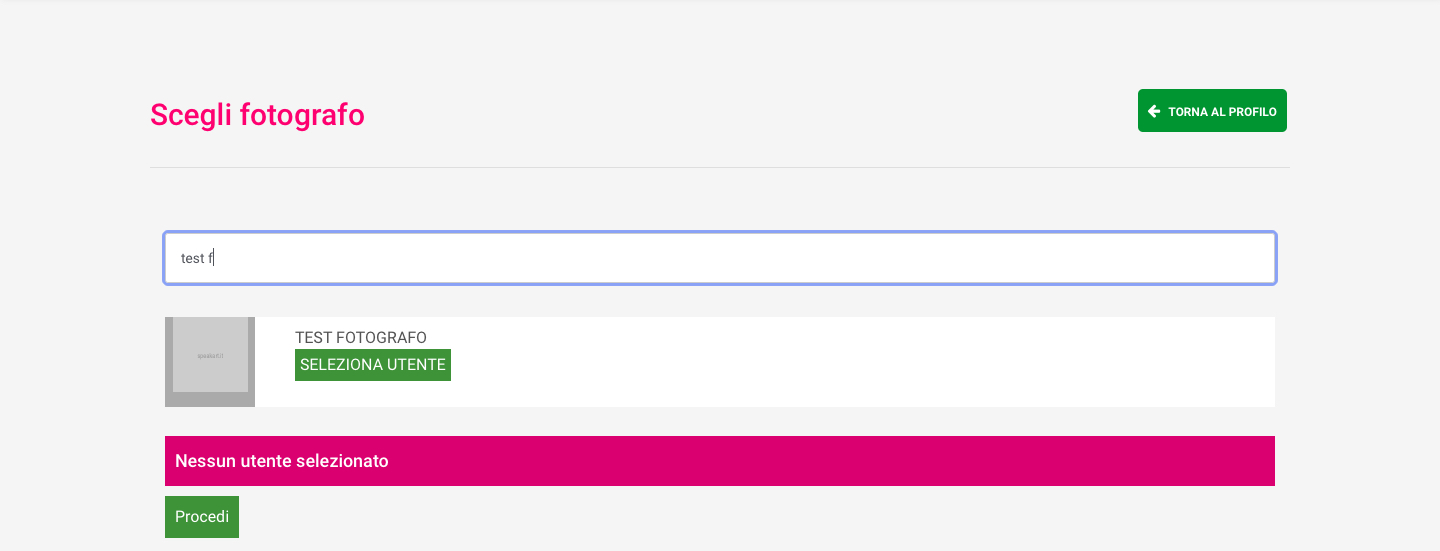
Once you have saved the photographer, you will be able to select him to interact with the works of your interest. Go to chapter 6.4 Choose the photographer.
If other users have already entered the name or the email address of the professional concerned, you will receive an alert message that informs you that the professional is already on the available list e you will only have to select it so that he will receive the invitation to interact with your artwork.
Go to chapter 6.4 Choose the photographer.
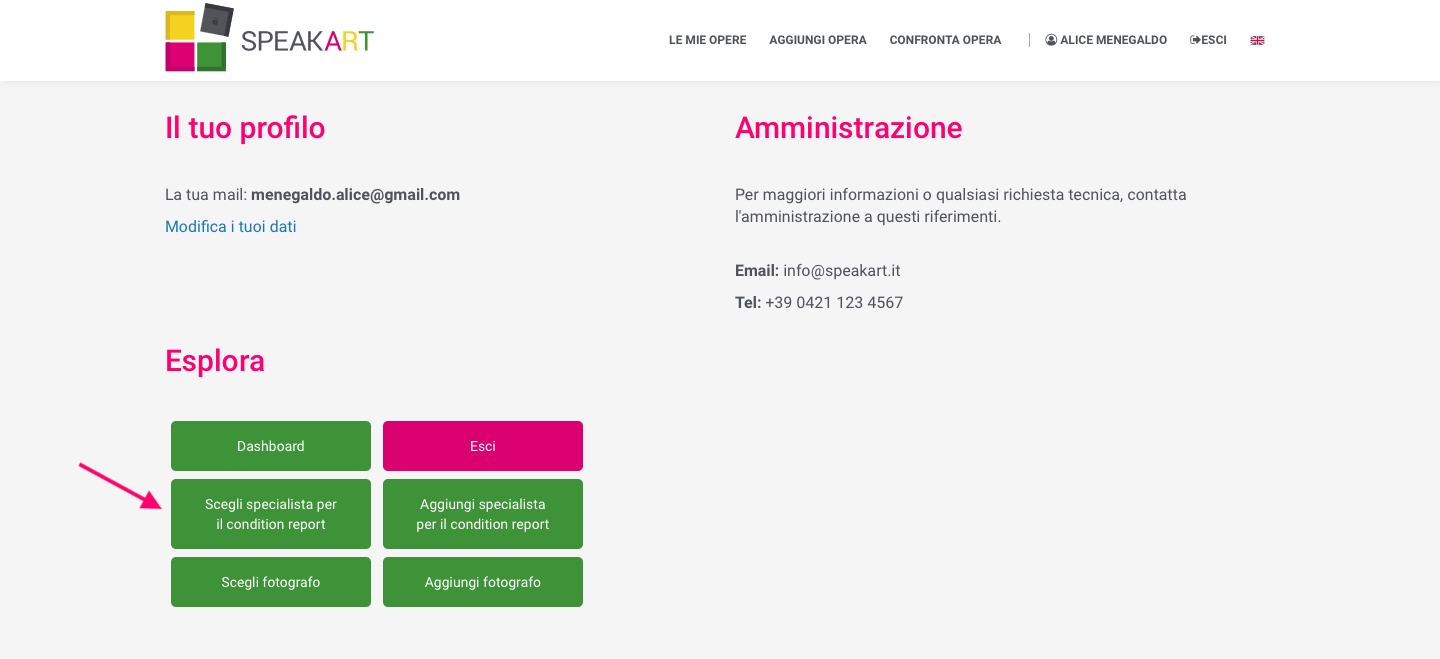
6.3. Choose a specialist to compile a condition report
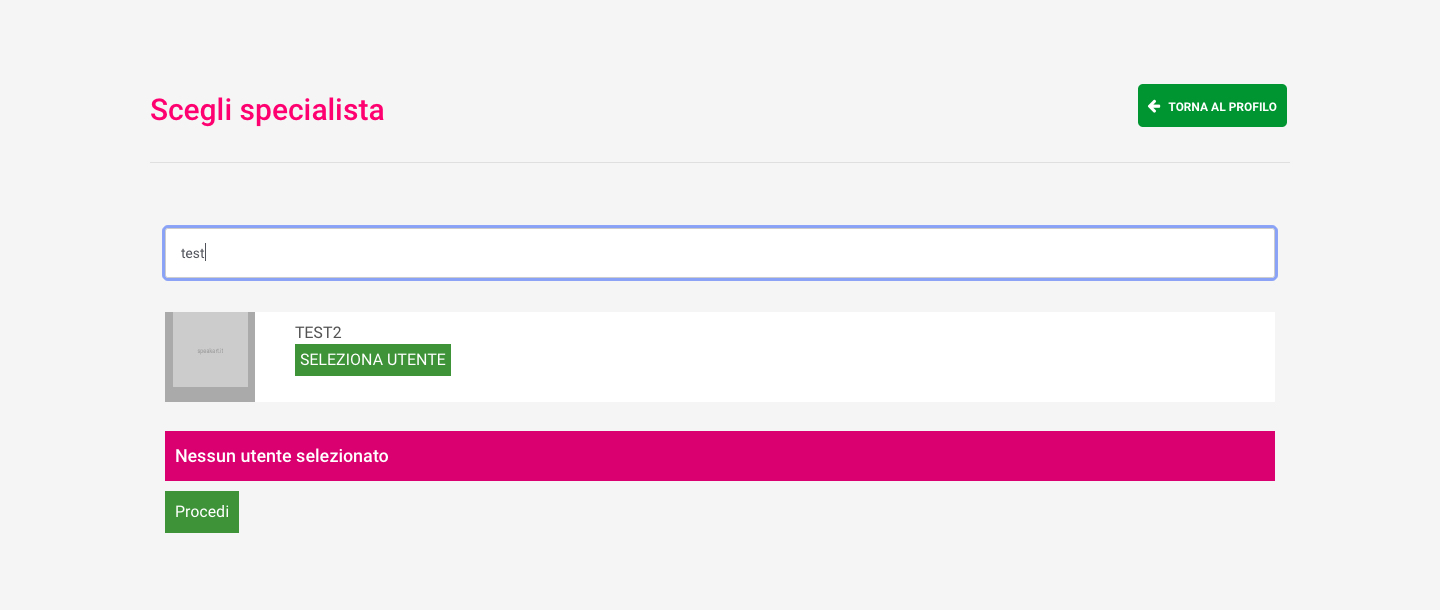
Clicking on “choose a specialist for the condition report” you will be able to select the chosen specialist to interact with the artwork to be analyzed.
The selection of the photographer will be made through the search bar where you just need to type a few characters so that the software can propose to you the list corresponding to the entered characters.
Once identified, click on “Select user” and the on “Proceed”
Similarly, you can search for the work to be selected on which you want the photographer to compile the condition report and then click on “Save”.
At the same time you click on this button, an email will be sent to the photographer which will allow him to access via user and password to all the artworks for which his contribution is required, with the following text:
User XXXXX ha assigned you a new work
Log in to view more details
LOGIN (link)
The photographer will be able to view all the matrices previously taken and saved on SpeakART, to download them and to read all the information about them.
The selection of the specialist will be made through the search bar where you just need to type a few characters so that the software can propose to you the list corresponding to the entered characters.
Once identified, click on “Select user” and the on “Proceed”
Similarly, you can search for the work to be selected on which you want the photographer to compile the condition report and then click on “Save”.
At the same time you click on this button, an email will be sent to the photographer which will allow him to access via user and password to all the artworks for which his contribution is required, with the following text:
User XXXXX ha assigned you a new work
Log in to view more details
LOGIN (link)
The photographer will be able to view all the matrices previously taken and saved on SpeakART, to download them and to read all the information about them.
7. Glossary
MATRIX = digital fingerprint of the artwork. It is a high resolution image of the artwork taken according to a photographic protocol that is the basis of SpeakART recognition and comparison algorithm.
CATALOGUING = the section allows you to enter all the information linked to an artwork.
EDITOR = a part of the condition report section that allows users to upload an image of the artwork where you can report and comment on the damages found in the comparison system. These notes and the image are then reported in the pdf print of the document.
CONDITION REPORT = the essential document for handling, shipping, restoring, describing, ensuring and preserving an artwork in the correct way (see SpeakART news).
SAVE = save
Frequently Asked Questions
Do I have to install any software to use SpeakART?
No, SpeakART does not require any installation. It is a system entirely in cloud, that is offered and used through the network. Therefore it is ready to use at any time. The database and its tools are always available. You just need to be connected to the internet.
Can I install SpeakART on many devices?
SpeakART is a software in the cloud which does not require any installation, so it can be used on any device through login and password. It is also programmed to be conveniently used on PCs, tablets and smartphones and it is platform independent. This means that it works on any device with the minimum system requirements.
Do I have to update SpeakART?
It is not necessary because SpeakART is a software in the cloud. It means that whatever update is prepared, routine or custom, no activity will be required for our customers. They will find the updated and improved software simply logging into their profile as usual.
Are softwares in the cloud safe?
They are much more safe than those physically installed. First of all, with cloud software, human errors caused by software installation and interaction with other programs on the PC are absent. Secondly, data entered in a cloud software is much more safe than data stored locally in a physical location. Indeed in case of theft of the machine (computer), there is no risk of a losing or a breach of the data stored in it, which in some cases can be particularly sensitive. The SpeakART code is programmed with the highest security standards.
Is SpeakART a blockchain certified system?
Yes, it is. This operation takes place at the request of the customer, agreeing which data he prefers to be saved, if he deems it necessary to keep his data by relying both on our servers and on a third party system.
Is it necessary to save data on the blockchain?
This choice depends on the client and on what he wants to do with the saved information and data. SpeakART logs, a real record of all the activities performed in the software, are automatically saved and stored by the system. Through these files, it is clearly possible to distinguish the action at the exact moment in which they are performed. So it is easy to find information if necessary. If the client wants this record of data and information to be performed by a non-partisan and unchangeable “body” over time, then we also offer the possibility of directly transferring the data entered into the blockchain.
How do I make the digital fingerprint?
Despite being a delicate and very important subject for cataloguing, the fingerprint is really simple to create. After a long research process, we are now able to accomodate our client by minimizing the difficulty of acquisition. Following SpeakART protocol, a single photo shoot is enough to guarantee the creation of the digital fingerprint of the artwork. You can create the photo shoot with a smartphone.
Who needs SpeakART?
Anyone who wants to catalogue and manage a small or big collection. Anyone who wants to keep all the information linked to the artwork. Anyone who wants to monitor the state of the artwork over time. Anyone who wants a complete tool to create condition and status reports.
What is the difference between the matrix and the image of the artwork record?
The images of the artwork record are not intended for the creation and the comparison of the digital fingerprint. They can also low resolution images, taken without any particular protocol. The subject can be the artwork or any other photo that the user considers useful to record to create an optimal profile of the catalogued object. Matrices are high resolution images which follow SpeakART photographic protocol, they are unique and create a digital fingerprint of the catalogued artwork when they are entered into the system. Two matrices can be compared by the software. Fakes, damages and natural decay can be found through the matrices.
What is the difference between the condition report and the status report?
The condition report is an official document, usually drawn up by an accredited professional: art historians, restorers, heads of archives and fondations, registrar are usually those in charge of the production of these documents. The status report is an important but not official document, which is nevertheless useful to keep track of the artwork status. It can be drawn up by anyone who is familiar with the artwork and has come into contact with it, including its owner (see collectors). If you want to know more click here.
Can the comparison also be made with infrared (IR) or ultraviolet (UV) images?
Yes, as long as the matrices entered still respect the proposed protocol.
What is a QR code and what is it for?
A QR code is a two-dimensional barcode (usually squared), which in most cases is black and white. It can be used to store information that is later read through a device, such as smartphones.
What is an authentication or certificate of authenticity?
It is that document that allows you to define the identity of an artwork. An artwork without authentication is an artwork of dubious authorship and provenance. If you want to learn more click here.

